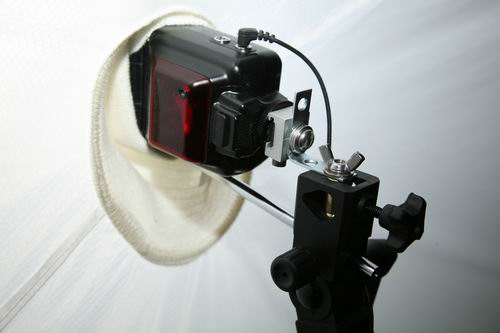
Strobist – Home Depot Umbrella Bracket Mount Hack
One problem I’ve had with the Strobist stuff over the past few months is getting the mount on my umbrella softboxes to work correctly in the field. Umbrella Softboxes pose a problem because umbrella mount on for light stands doesn’t allow you to point the strobe to the middle of the umbrella, and the opening for the umbrella softboxes is directly in the middle of the umbrella.
I already had one hack for this situation that involves hooking up 2 umbrella mounts together, but I’ve found that this setup cannot support heavier loads and if the wind blows hard, the entire setup will twist apart resulting in disaster. Having recently bought a 60″ Softlighter II, there is no way that the old hack would work on that HUGE and HEAVY 60″ Softlighter.
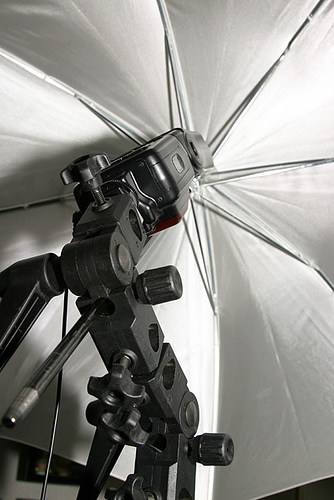
Above: My original dual umbrella adapter hack
Later, I came across a post by Flickr user Luzer about the hack he came up with to get around the problem. His solution was to purchase a Smith Victor Stand Flash Stand Shoe from B&H photo and it looks like he had to hack that up a little as well.
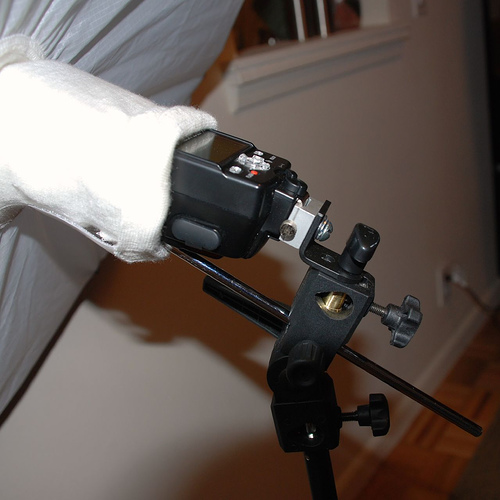
Above: Luzer’s umbrella softbox hack – See his entire post here: http://www.flickr.com/photos/bigluzer/500249073/
I went to Home depot to try to duplicate Luzer’s hack because I didn’t feel like ordering the part from B&H, paying shipping, and waiting for 2 weeks. Also, I have 3 light stands and I didn’t want to pay ~$25 + shipping for all 3 stands.
Today I was able to come out of Home Depot with an elegant solution that cost my less than $8.50 including tax (and no shipping) for total for 3 sets of 90 degree adapters.
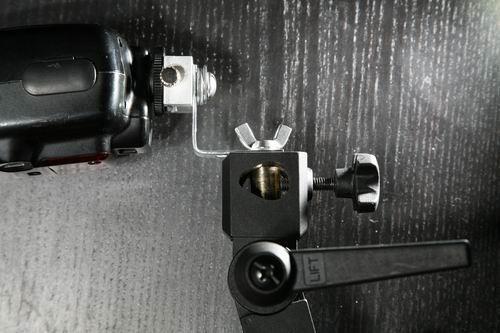
Above: the finished product – a “supertsai” 90 degree adapter for an Umbrella Bracket
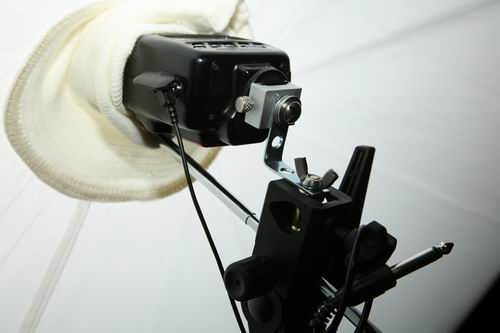
Above: the finished product in use with a Softlighter II
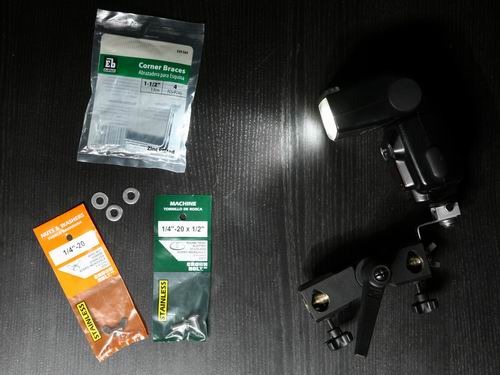
Finished product once again and the materials needed to construct it.
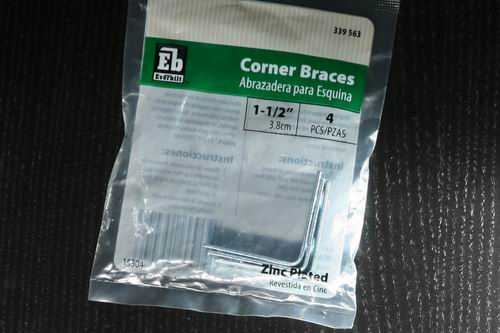
Equipment needed for 1 adapter hack:
1-1/2″ Corner Brace
1/4″ – 20 Wingnut
1/4″ – 20 x 1/2″ Machine screw(I think a 1/4″ long one would have been ideal but I couldn’t find any)
1/4″ Cut Washers (I used 3 because my screws were a bit too long)
I found all of these items in the same aisle at Home Depot. The wingnut, screw, and washers were right next to each other in the screw aisle. The corner brace was almost directly behind the other items next to the door hinges and door bolts.
Everything pretty much screws together pretty easily. You will need either a screwdriver or a penny to use as a tool.
Instructions:
Tools you need:
Phillips and Flat head screwdrivers
A Socket wrench with a 1/4 bit
pliers
The holes are a tight fit so you might want to use some gloves too b/c brute strength might be necessary
1. Remove the hotshoe mount from your umbrella bracket first (it’s the silver thing that attaches to the strobe.
2. Use the machine screw to attach the hotshoe mount to one of the lower holes of the 90 degree corner bracket using your screwdriver or penny (use washers as spacers if the screw is too long). If the fit is too tight, get some pliers and an old sock to hole the hotshoe mount in place while you turn the machine screw.
3. Finally, attach the 90 degree corner brace to the thread coming out of the umbrella bracket where the hotshoe mount used to be using the wingnut you bought.

Viola! you are done.
Some things that I noticed you could do to improve the design after I took the first photo are mounting the hotshoe bracket sideways on the corner bracket so that the ridge of the hotshoe bracket supports some weight. Also, you can mount the umbrella bracket on the lower of the 2 holes on the corner brace. You can also use washers on the wingnut\umbrella mount contact point to distribute the weight a little better.
I also have another mod that allows for 2 strobes to share a single umbrella.


